- OPMAATZAGEN.nl
- Do it yourself
- DIY Projects
Create your own epoxy table with ancient industry style table top, by Adrie


Create this project yourself with sheet material cut to size by OPMAATZAGEN.nl!
Adrie
Challenging
2 minutes
Discover the art of Epoxy with Adrie's Ancient Industry Table
Are you looking for inspiration to create a unique piece for your interior? Then get inspired by Adrie's project, who created a beautiful 'Ancient Industry' table using epoxy and a detailed eye for design. This DIY guide takes you through the essential steps to create a similar work of art in your own home.
The beauty of craftsmanship and epoxy
The base of this masterpiece was cut to size by OPMAATZAGEN.nl, but the magic happened in the hands of the maker. The wood, MDF Blank 18 mm and 9 mm, was carefully prepared to meet the high demands of epoxy casting. With a depth of color and an intricate composition of gears and natural elements, Adrie's table brings a unique industrial, yet antique style to any interior.
How this unique table fits into your living room
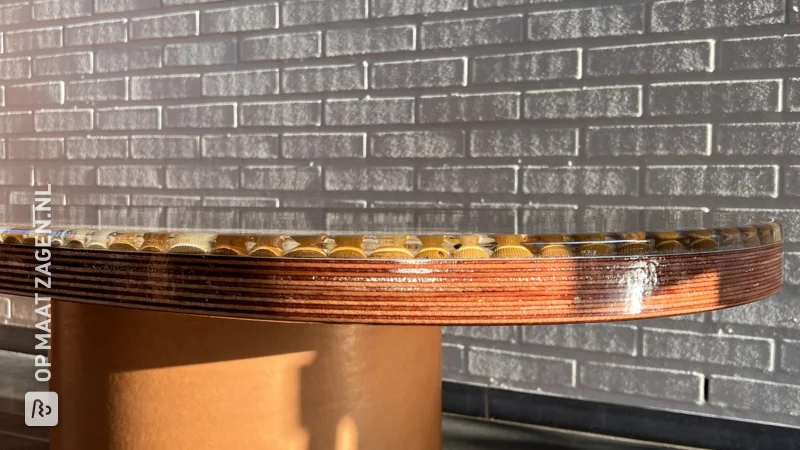
This beautiful epoxy table, complete with intricate embellishments, takes center stage in the living room. The reflection of light on the epoxy and the sense of depth create an atmosphere that would look equally at home or in a gallery. This table is a natural focal point and a conversation piece for every guest that enters your home.
Flexibility and freedom of choice in your project
Making your own epoxy table like this one not only gives you a sense of achievement, but also the opportunity to experiment with dimensions and materials. You choose the types of wood, the colors of the epoxy, and the embedding that makes your table unique. Plus, it can be a cost-saving approach compared to buying a similar designer piece.
The style of Adrie's Table
This 'Ancient Industry' table combines the best of both worlds: the robustness of industrial materials and the delicate aesthetics of antique objects. The result is a timeless creation that shows how old and new can enhance each other. The table exudes character and refinement, which is sure to attract attention in any room.
Tip! Also check out our handy DIY tips!
Step by step guide
Montage
The plan: I had been thinking about making an epoxy table top for at least two years. I had no experience with casting epoxy resin so the first phase was reading up. I wanted to do something crazy with it. Not a river leaf or anything like that, no that was a bit too ordinary for me. After much pondering my plan finally took shape. It had to be a dark old industrial steampunk-like world cast in epoxy. So first I ordered hundreds of gears from Ali Express and went looking for old computer motherboards. It took months before I had all that stuff together. I was a bit afraid that my crazy idea would end up in a product that housemates and friends would label as “Ugly as hell” and that might look out of place in a cozy living room. It could be a Beauty or a Beast… But I persevered anyway and in May of this year I ordered the MDF board material for the table. And that arrived quickly, perfectly cut to size by opmaatzagen.nl. The party could begin!
The execution: First I provided three plates of 10 mm MDF with a large elliptical irregular hole and glued them together so that a kind of hollow was created in the middle of the plate. I made a kind of lava-like mixture with a mixture of cheap black acrylic paint and sawdust and smeared this in the "hollow" and the rest of the surface. Then I sawed out the motherboards in a irregular shape and mounted them in the corners of the hollow. The few hundred gears that I had bought were partly made of wood and partly of metal. I gave them an old weathered look. So first I provided the wheels with a layer of aluminum paint and then dabbed a touch of black and brown over it. The motherboards were also given a similar finish. I had not thought that all those layers would eventually run into each other because of the epoxy, but it gave the end result an incredibly beautiful natural "old" finish. In addition to the gears, I also made pipes in them and an antique-looking electricity network. And as an extra eye-catcher I made a kind of endlessly deep mine shaft in the middle of the pit. I achieved that endless effect by mounting two mirrors at both ends of the “shaft” which is actually only 7 cm deep. It was really fun to think of and make all that. My Ancient Industry world was already starting to take shape…. But we were still far from there, as it turned out… While doing so, the idea came to make lighting in it. I also thought that the lighting had to be replaceable, so casting the LEDs in epoxy was not an option. The solution was fiberglass. Dozens of minuscule and subtle lights by means of fiberglass ends that come together in two bundles and are illuminated by only two LEDs. And in that industrial fantasy world, a few solar panels also fit in perfectly. Four rechargeable AA batteries provide light for hours without having to be recharged. I made the base from multiple layers of 18 mm MDF glued together to give the impression that the base is heavy and solid. All seams neatly filled with two-component polyester filler. After a few fanatical sanding sessions, there were no seams visible anymore. I finished the base with two layers of color and three layers of clear acrylic lacquer. On one side of the table I made a small drawer for all the remote controls of the TV and the Playstation. I wanted the epoxy to continue over the edges, so the entire top had to be provided with a waterproof casting mold. I made that mold from 10mm MDF slats and sealed it with duck tape.
Finish
And then things started to go wrong… The moment I had been dreading all this time was there. Pouring the epoxy resin! I had calculated that I would need about 11 liters of epoxy to provide the entire sheet with a thick, crystal-clear layer. Calculating the volume of the “hole” was a challenge and I had to guess a bit. Mixing epoxy is a very precise job. The ratio of resin to hardener must be exactly 100/50. Mixing was also very important. The longer the better. Any deviation in the mixing ratio or mixing for too short a time can result in a permanently soft emulsion and you don’t want that. Epoxy must become rock hard. Armed with a kitchen scale and old measuring cups, I started mixing the substance. This had to be done in two stages because if I poured all the epoxy at once, I ran the risk of the emulsion becoming too hot during mixing. I had set the table exactly level so that all the epoxy would spread evenly over the entire sheet. And that all went well. The entire top plate was filled nicely and the casting mold (i.e. the edges) also filled up nicely and evenly. But after a few minutes thousands of small air bubbles appeared. The mixture of acrylic paint and sawdust probably contained a lot of air and that came to the top. But I had read up well during the preparation and knew how to combat these bubbles. With a paint stripper on the lowest setting those bubbles disappeared like snow in the sun. But because the bubbles kept coming I repeated the action with the paint stripper dozens of times. At a certain point it became less. Time to go to bed. The next day the casting mold appeared to be as leaky as a basket. The epoxy had leaked out from several sides. But that was not the biggest problem… New bubbles had also become visible during the night, but they did not go away with the paint stripper. The emulsion had now become a thick syrup and that made it impossible to remove the bubbles. There were hundreds of bubbles just below the surface. So that would require a lot of sanding to get them away. After three days the epoxy had fully hardened and I started the sanding process. In the beginning I could still do this by machine because of the coarseness of the sandpaper. But from grit 800 I had to switch to manual work. After two full days of sanding I could be proud of the result. It felt smooth and even. Time for the last phase: polishing. Fortunately I could do this by machine and used a special angle polisher with Commandant 4 as abrasive. After a very long time of polishing the first shiny spot finally appeared and unfortunately it turned out that my sanding had not been sufficient. Tiny hair-fine holes and scribbles appeared. The air bubbles had become holes due to the sanding and these had then filled with sanding dust and Commandant 4. So that meant sanding from coarse to fine again. My courage sank for the first time and I took a break for at least two months. I was completely done with it. Apart from the sanding I also had the problem of the hundreds of filled air bubble holes. How did I get them clean? Moisten and clean with an air compressor, vinegar, rim cleaner, acetone, nothing helped…. Eventually I decided to use the big guns. I wrapped the MDF base in plastic and put the table outside on the driveway. Then got out the high-pressure cleaner and attacked the holes with the dirt blaster. Bingo! In no time the bubbles were empty and the problem had been tackled! But I got another one in return. The plastic around the base was not resistant to the water violence and my carefully sanded seams of the base became visible. The paint from the Action turned out to be of seriously substandard quality. Despite the fact that I had applied two coats of color and three coats of clear varnish, too much moisture had ended up on the MDF and the seams bulged. So the base had to be sanded and varnished again. I did not feel like sanding the table top for two days again and decided to pour on an extra layer. However, that extra layer did not want to spread well and I decided to give the epoxy a helping hand by leveling out the epoxy with a thin paint roller and window squeegee. I hoped that the epoxy would eventually flow and the irregularities of the paint roller would become invisible. But that did not happen. The result was, if possible, even worse than before the extra pouring layer. The entire surface was one of holes and stripes. I was really on the point of labeling the entire table as a “mission failed”. My only salvation was an extra thick layer of epoxy that was thick enough that it would flow completely evenly and would give a crystal clear surface by itself. The risk with this was that every speck of dust would mean that I would still have to sand for two days. That is why I carefully dedusted my entire garage and vacuumed it several times before applying that last layer. I still had a liter of epoxy left and I mixed it completely and poured it onto the top while I did this in my underwear because clothing is dust and dust is NO GO! Good thing the neighbors did not see me working. …Then I didn’t enter the garage for two days. The tension was palpable. Two days later I opened the door and saw a divinely sleek, high-gloss table top on which my dark industrial world lay there, looking beautiful. I felt like the king of the world. Then I sanded and varnished the bottom again and put the table in our living room. I’m not exaggerating when I say that at least 150 hours of work went into that table, but the result is impressive. For the photos I lit the table with a spotlight and it looks much lighter than it actually is. During the day the wheels are hard to see. But in the evening with a spotlight on it it comes to life and generates the necessary reactions from housemates and guests. Almost all very positive and ranging from “Wow!” to “Uuuh, that’s really daring!” For me it has become quite a “Beautiful Beast”. All’s well that ends well, but for me never, ever epoxy again!
What now?
Want to make this DIY project? Check out Adrie's saw list and complete your order easily.
€ 268,39
View all sheet materials
My experience with OPMAATZAGEN.nl
Order
Delivery
General experience
