- OPMAATZAGEN.nl
- DIY tips
Everything you need to know about the back wall of a TOSIZE Furniture shelving unit
Everything you need to know about the back wall of a TOSIZE Furniture shelving unit
Bij TOSIZE Furniture draait alles om maatwerk. We bieden kasten die volledig kunnen worden aangepast aan jouw ruimte, stijl en behoeften. Eén van de belangrijkste onderdelen van ons systeem is de achterwand van de kast. Dit simpele, maar onmisbare element is essentieel voor de stabiliteit en het ontwerp van je kast.
In dit artikel leggen we je uit hoe de achterwand werkt, waarom ze zo belangrijk zijn en hoe je deze eventueel kunt aanpassen voor een persoonlijke touch. Daarnaast beantwoorden we veelgestelde vragen en geven we je inspiratie voor creatieve toepassingen.
In this article:
- What is the TOSIZE Furniture Concept?
- Practical information about the back panel
- Adjusting the depth of the back panel
- The cabinet as a room divider
- Frequently Asked Questions
What is the TOSIZE Furniture Concept?
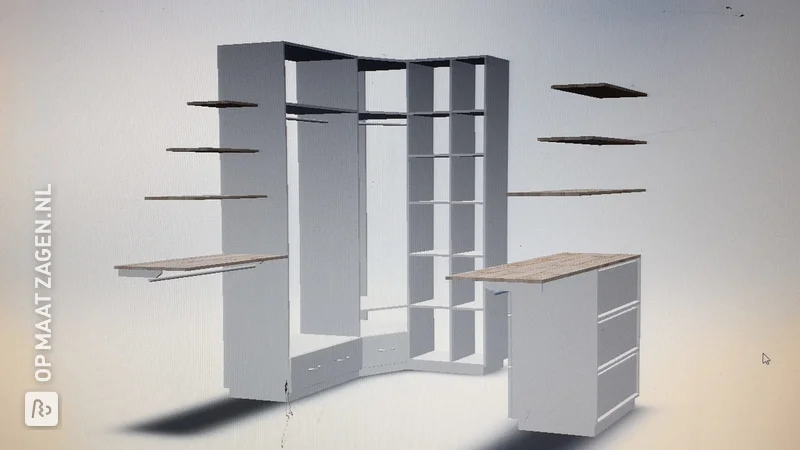
A TOSIZE Furniture compartment cabinet is custom-made based on your design via our 3D configurator. This way, it will always fit perfectly into your space and meet all your needs. The back panel is an essential part of the design, providing stability and contributing to the overall aesthetic of your cabinet.
Practical information about the back panel
At TOSIZE Furniture, you have the freedom to assemble the cabinet in the desired dimensions. The back panel is a fixed part of the design, meaning it cannot be adjusted to arbitrary thicknesses or materials, nor can it be omitted. The back panel is essential for the stability of your cabinet. Other details about the back panel are:
- The maximum dimensions of a back panel are: 157.4 cm x 100.0 cm.
- The back panel is always made of the same material as the body of the cabinet.
- The back panel always has a thickness of 18 mm.
- The back panel is always recessed into the compartment.
Adjusting the depth of the back panel
Did you know that you can customize the back panel of an open compartment? You can easily do this in step 2 of the configurator. This allows you to use it as a TV niche, for example, but there are many other possibilities. Read more below!
Practical examples
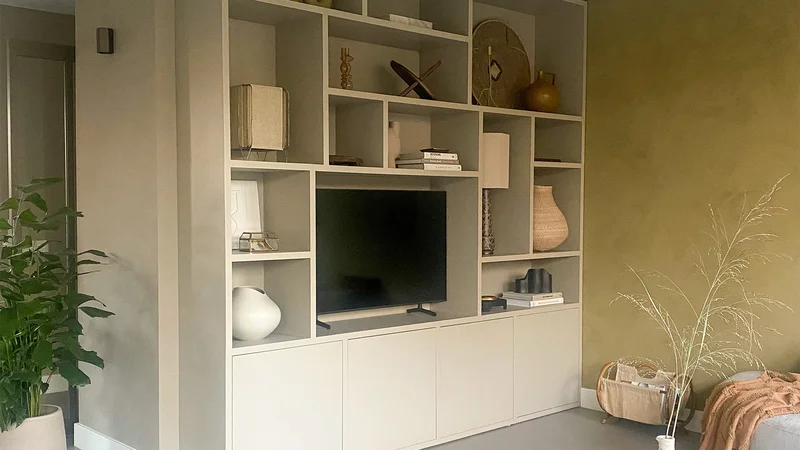
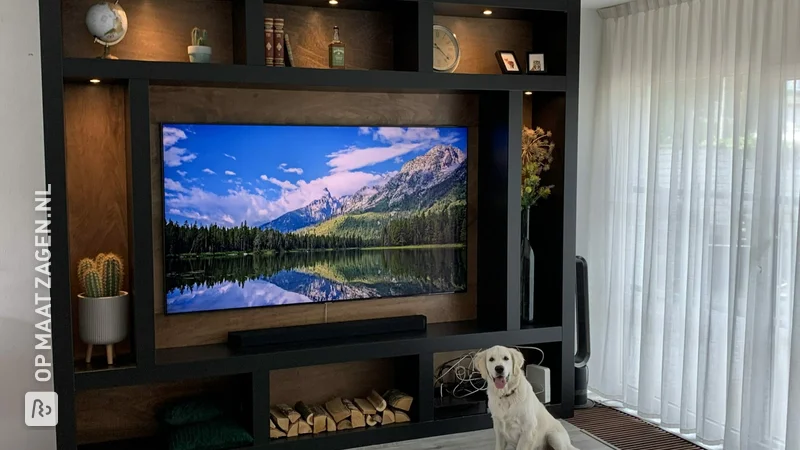
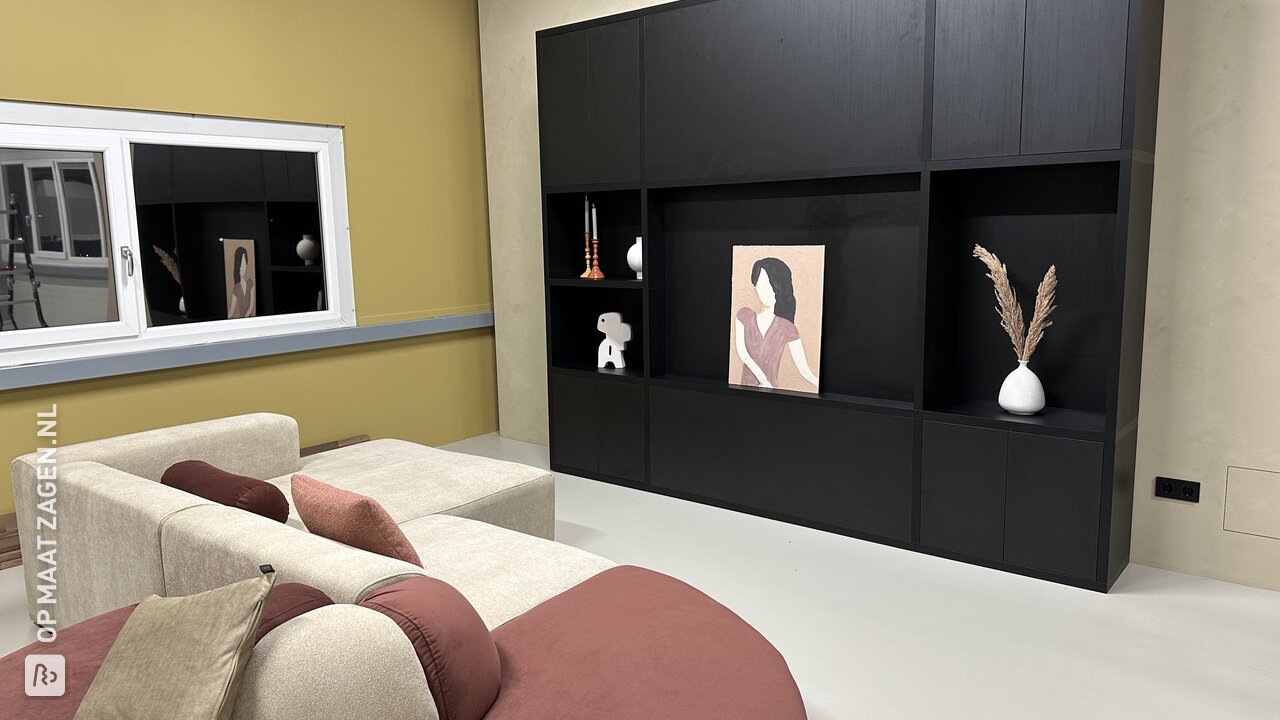
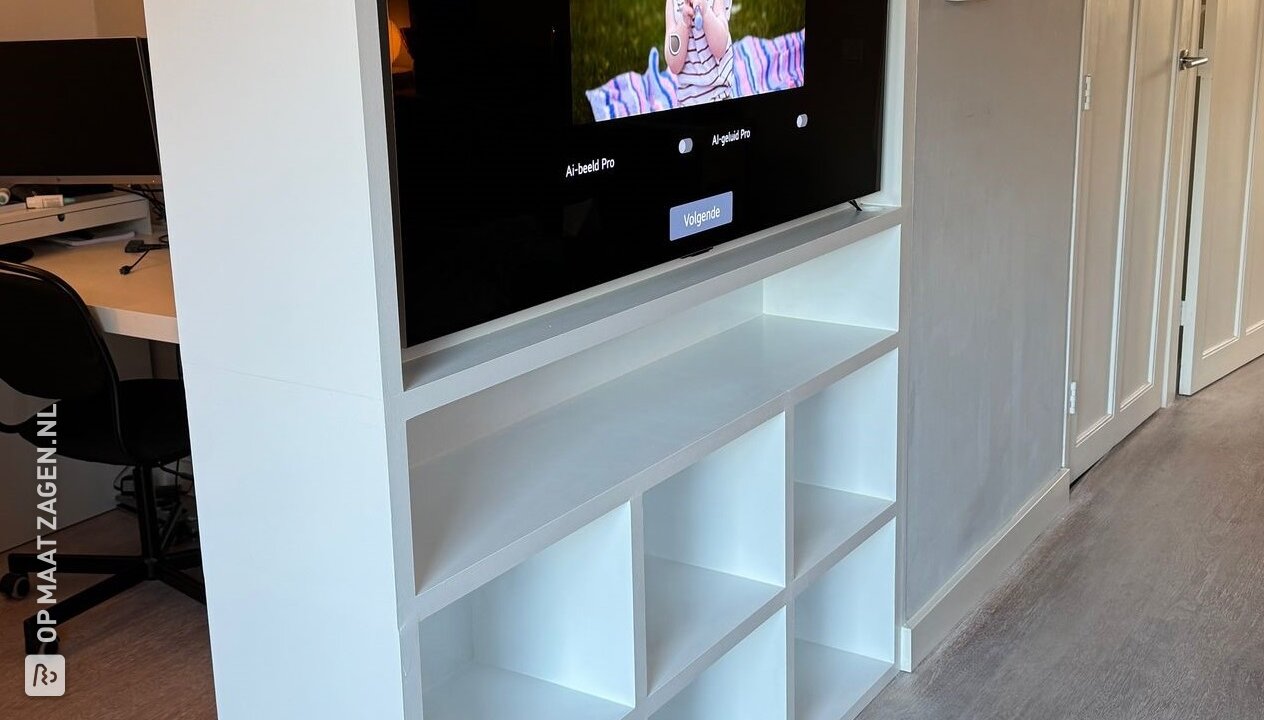
Compartment with adjusted depth as TV compartment
By placing the back panel of an open compartment, where your TV goes, further forward, the TV hangs further out in the cabinet, making it easy to view from all angles.
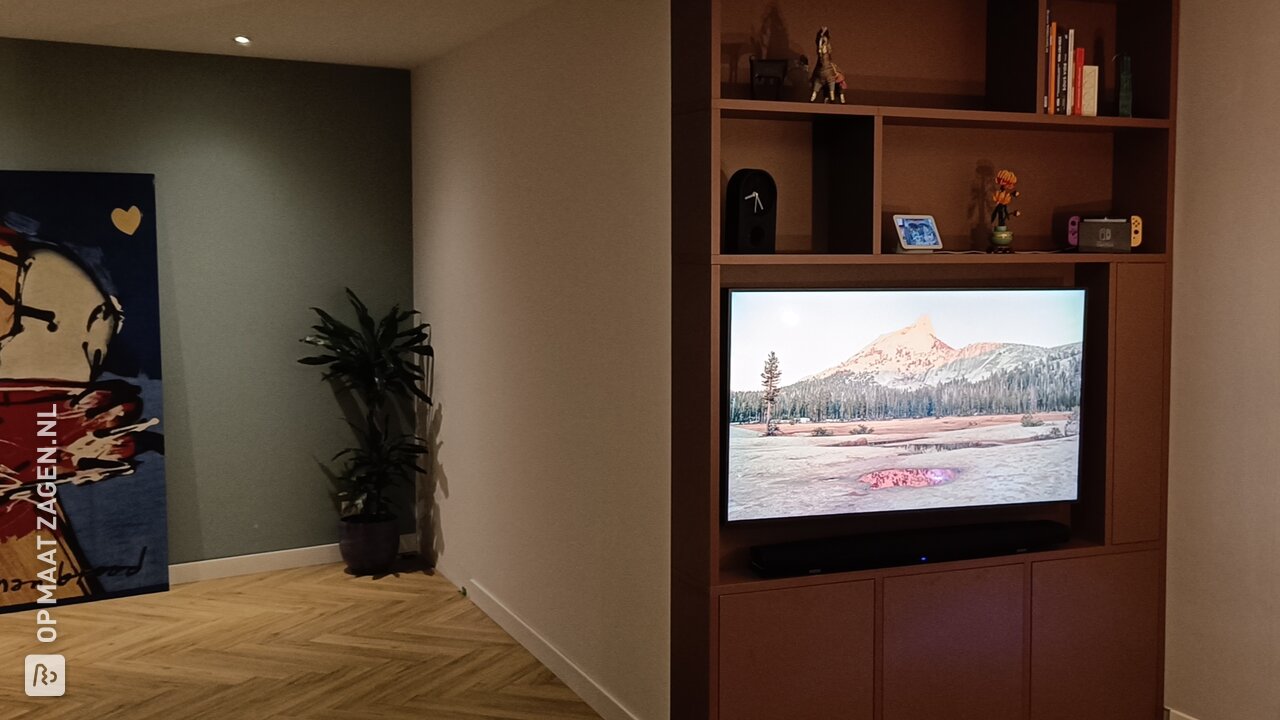
Tips for the ideal depth of your TV compartment
The advice we can give regarding the depth of the compartment depends on how and where you usually watch TV: directly in front of it, or from side angles. Our advice is to measure a few things:
- The thickness of the TV (including the stand or base, if applicable)
- The possible bracket
Then add 1-3 cm extra space. In that case, the TV will sit slightly inward, providing a good view from different angles. However, some people deliberately choose to place the TV deeper inside the cabinet. This makes the TV less noticeable in the room, but it's less suitable if you also want a good view from the sides.
Mounting your TV on the wall
Use the extra back panel reinforcement: We provide an additional 18 mm thick plywood plate upon request, which you can mount on the front or back of the wall. This plate provides extra support for mounting and ensures that your TV stays securely mounted. Always drill through both the back panel and the plywood plate to ensure everything is securely attached.
Compartment with adjusted depth for cables
An adjusted cabinet depth can be a smart choice if you want thick cables to run neatly behind the cabinet. By making the compartments shallower, you create enough space behind the back panel to hide cables in an organized manner. Moreover, this can extend the lifespan of your cables, as they won't be bent or damaged. It also results in a cleaner and more professional final look, ideal for a tidy interior.
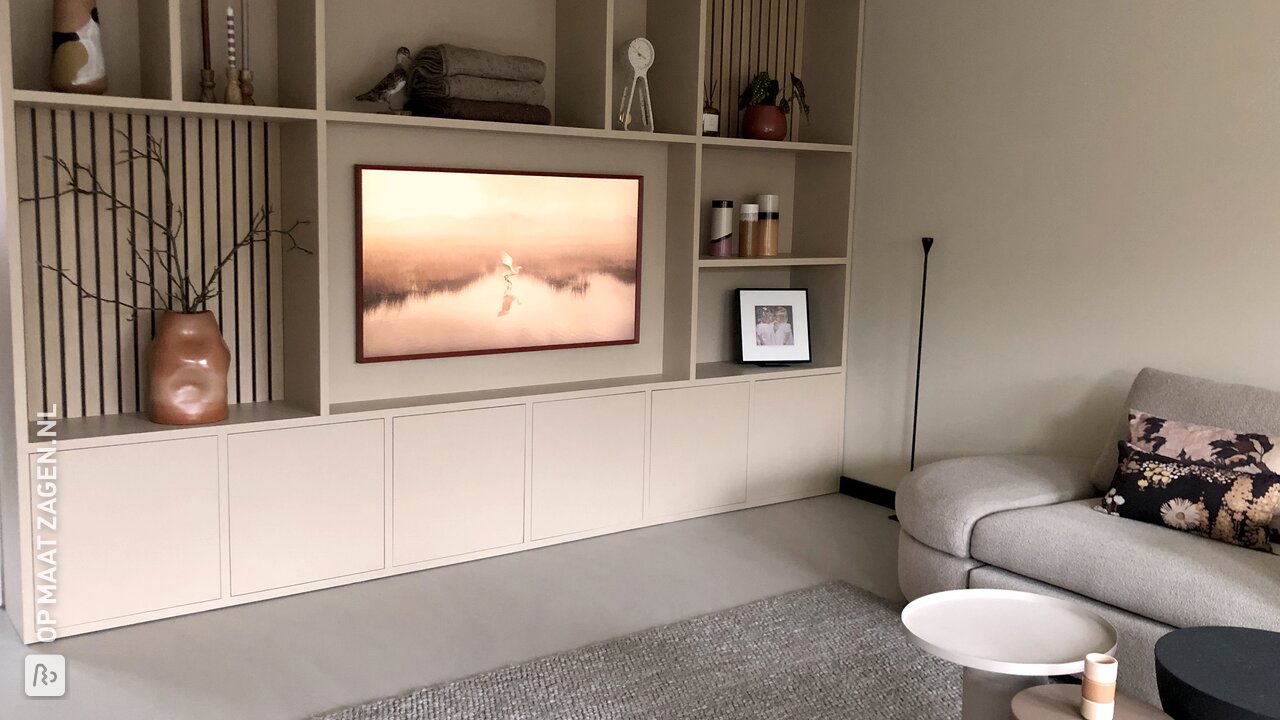
Compartment with adjusted depth for a painting
A cabinet with a shallower depth can be ideal if you want to hang a painting. By placing the back panel forward, the painting or artwork will hang more prominently in view.
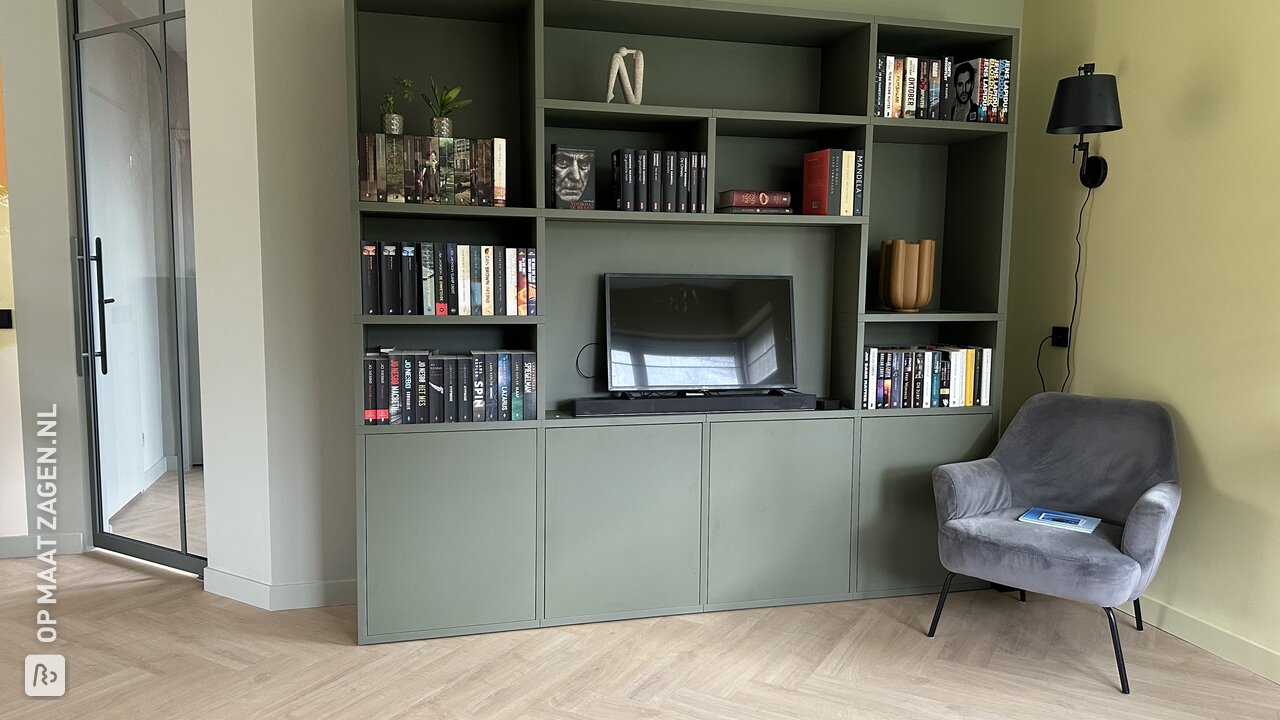
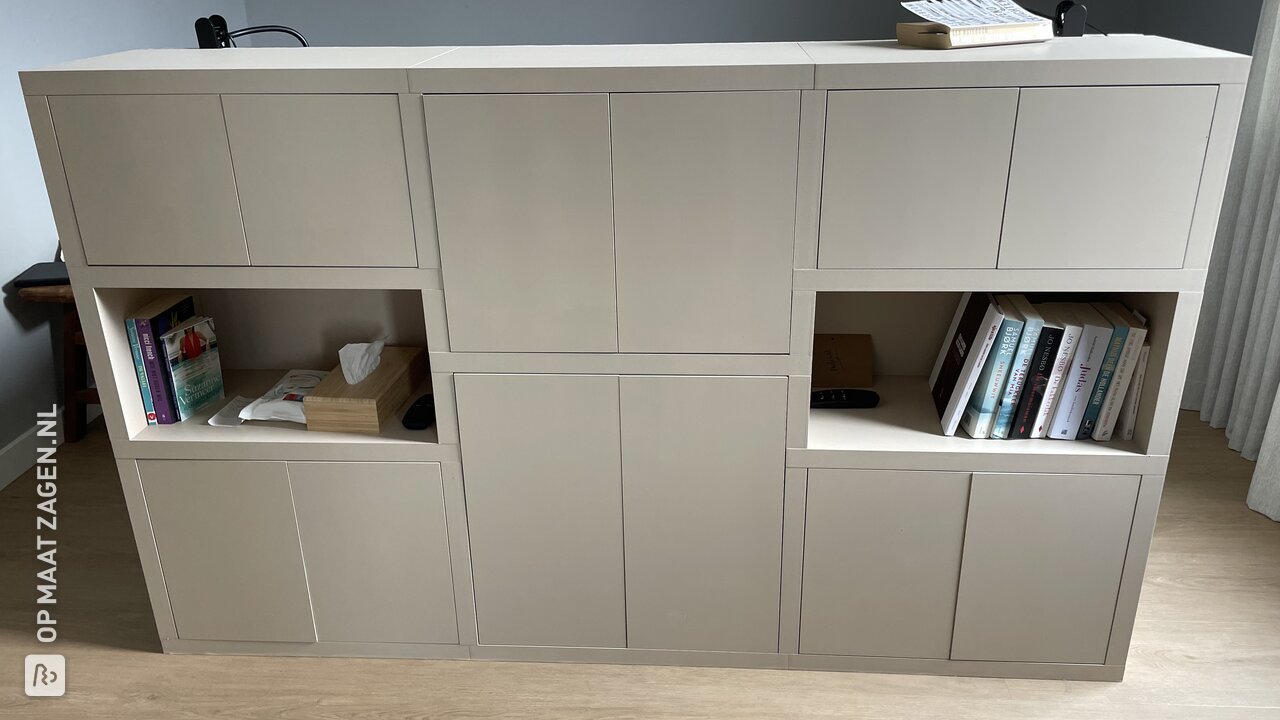
Compartment with adjusted depth for books
Shallower shelves prevent books from getting jumbled or shifting, improving the organization. This makes it easier to find books at a glance and ensures they stay upright without taking up extra space.
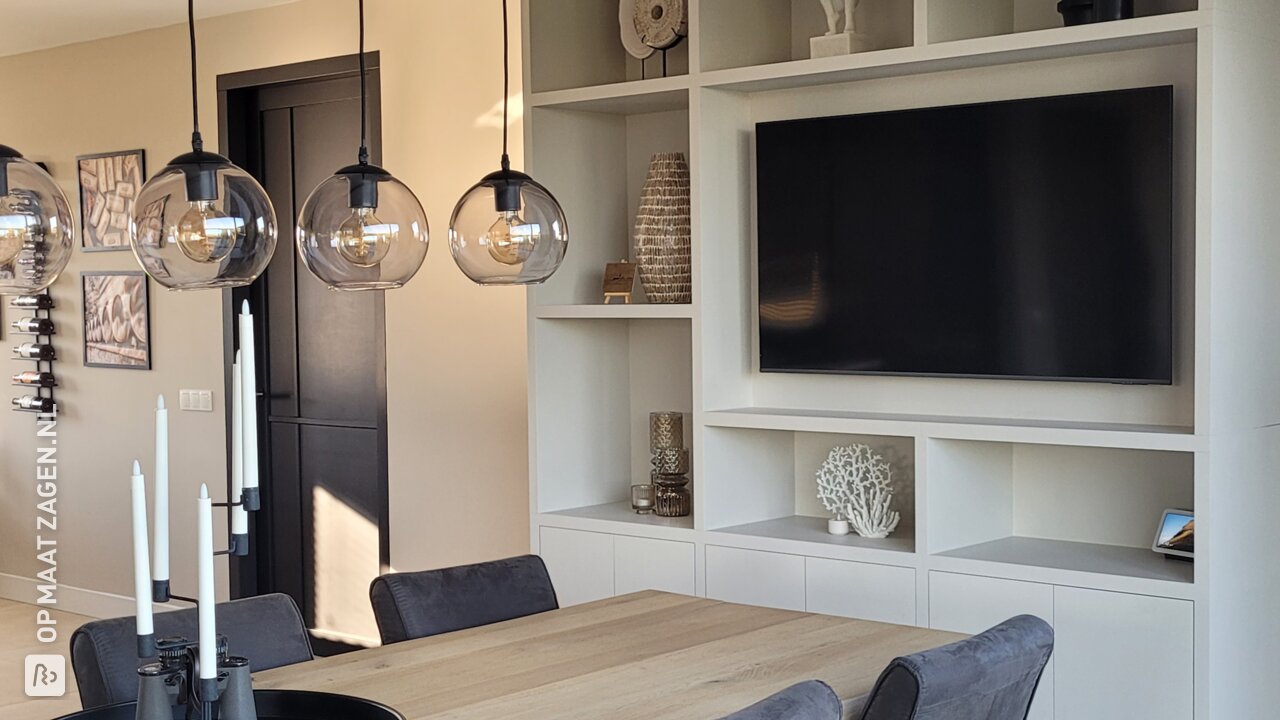
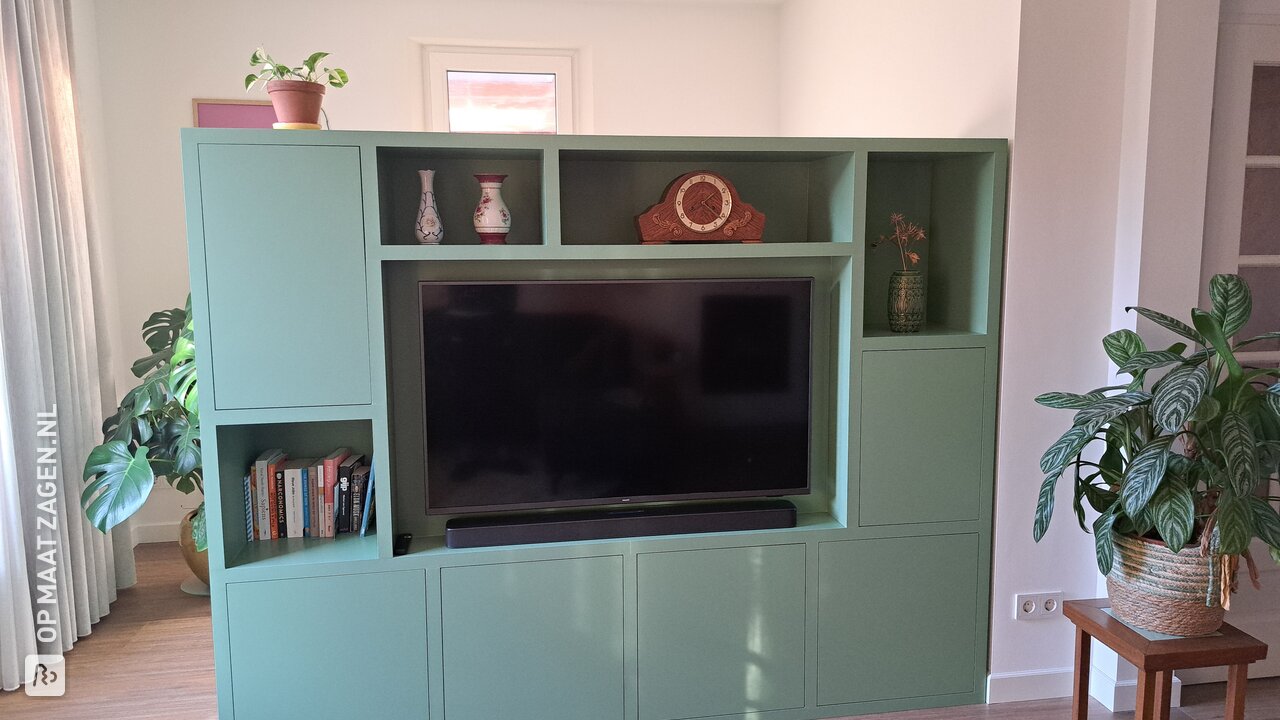
Compartment with adjusted depth for a cinewall effect
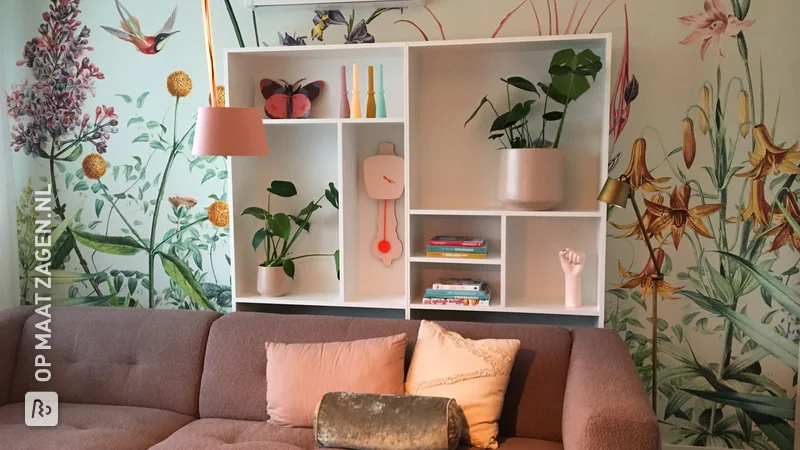
A cabinet with a shallower compartment, or compartments, is ideal for creating a cinewall effect, maintaining a calm, minimalist appearance. By aligning the compartments at the front above and below the TV compartment, you create a sense of height in your design. This helps visually elevate the room or make it appear wider. An example of a cinewall effect can be found in the project by Ivonne, where the compartments above and below the TV compartment are set to 0.0 cm.
The cabinet as a room divider
A frequently asked question is whether our cabinets can also be used as room dividers. In principle, the cabinet is not made for this purpose, but it is possible. If you want to use the cabinet as a room divider, read the tips below:
- Note that the back panel is always present in the entire cabinet, and we cannot make exceptions here.
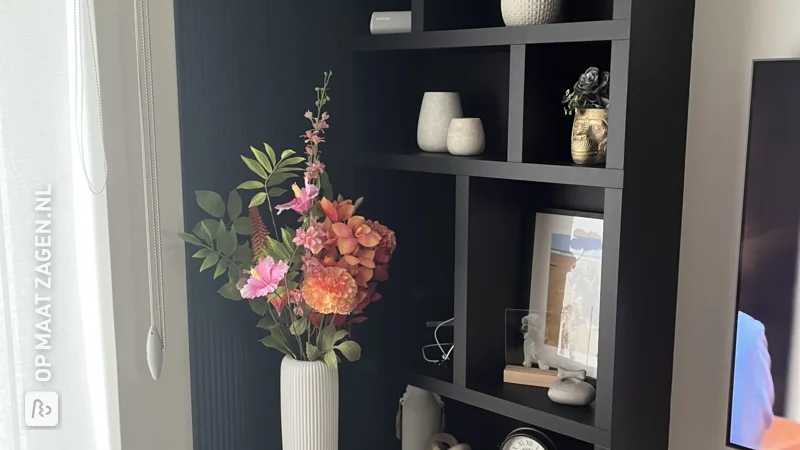
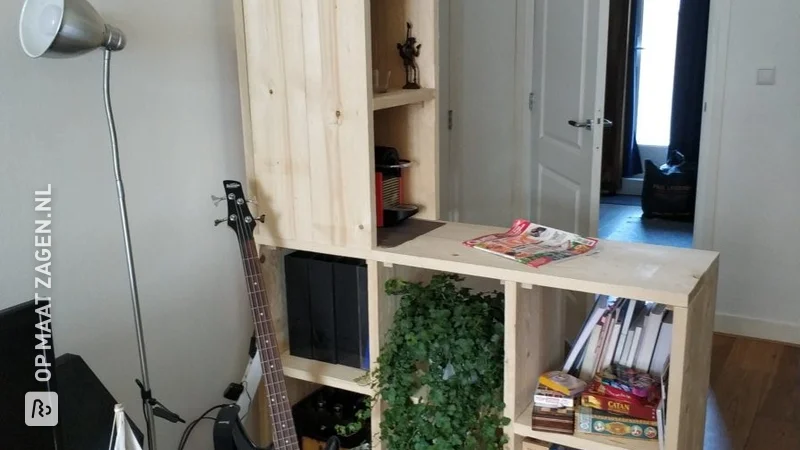
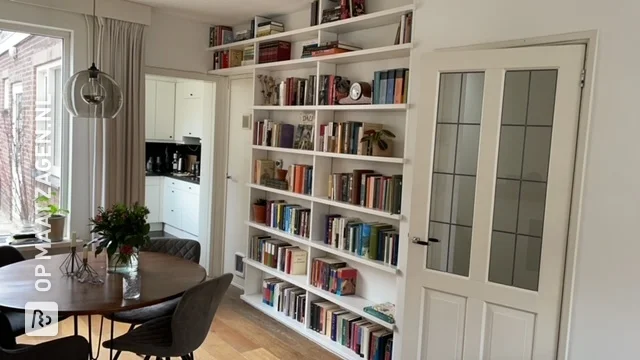
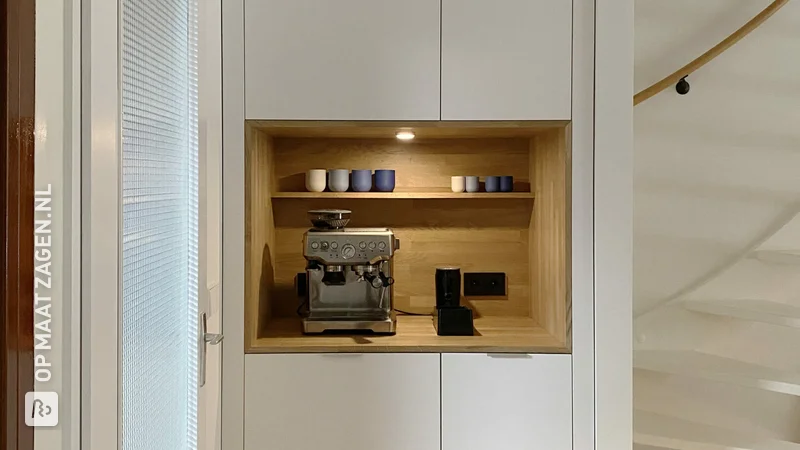
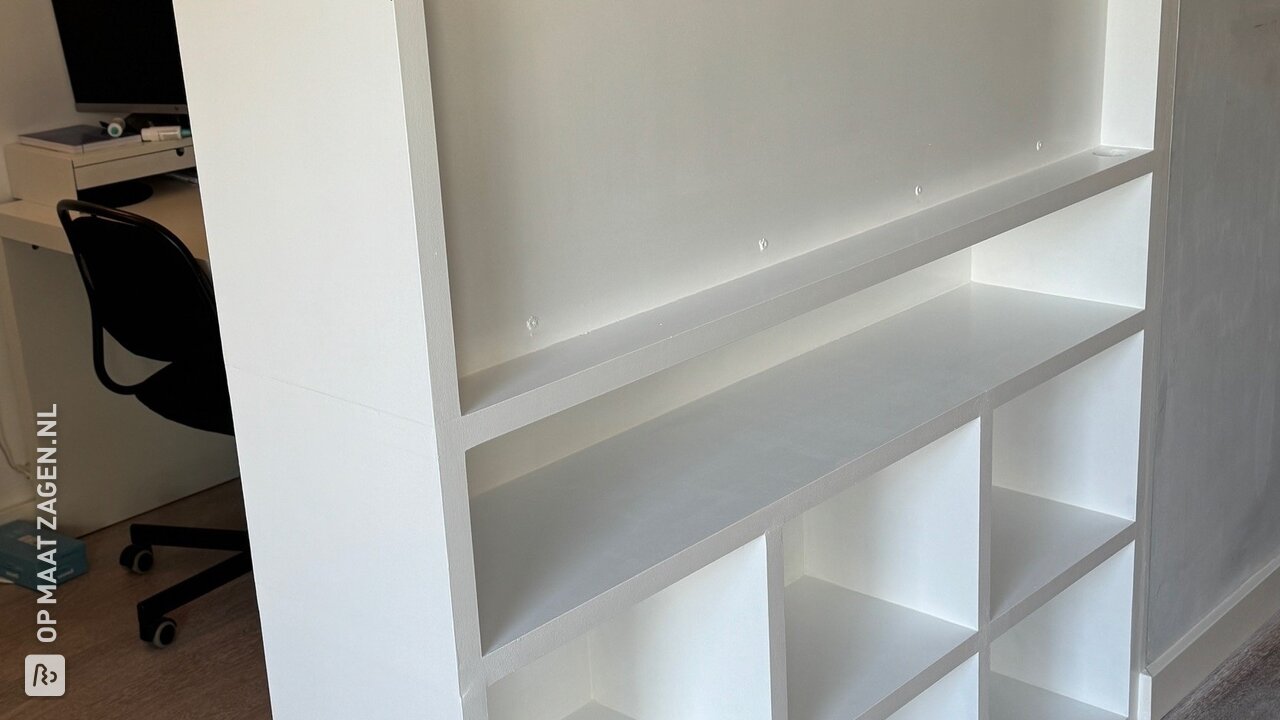
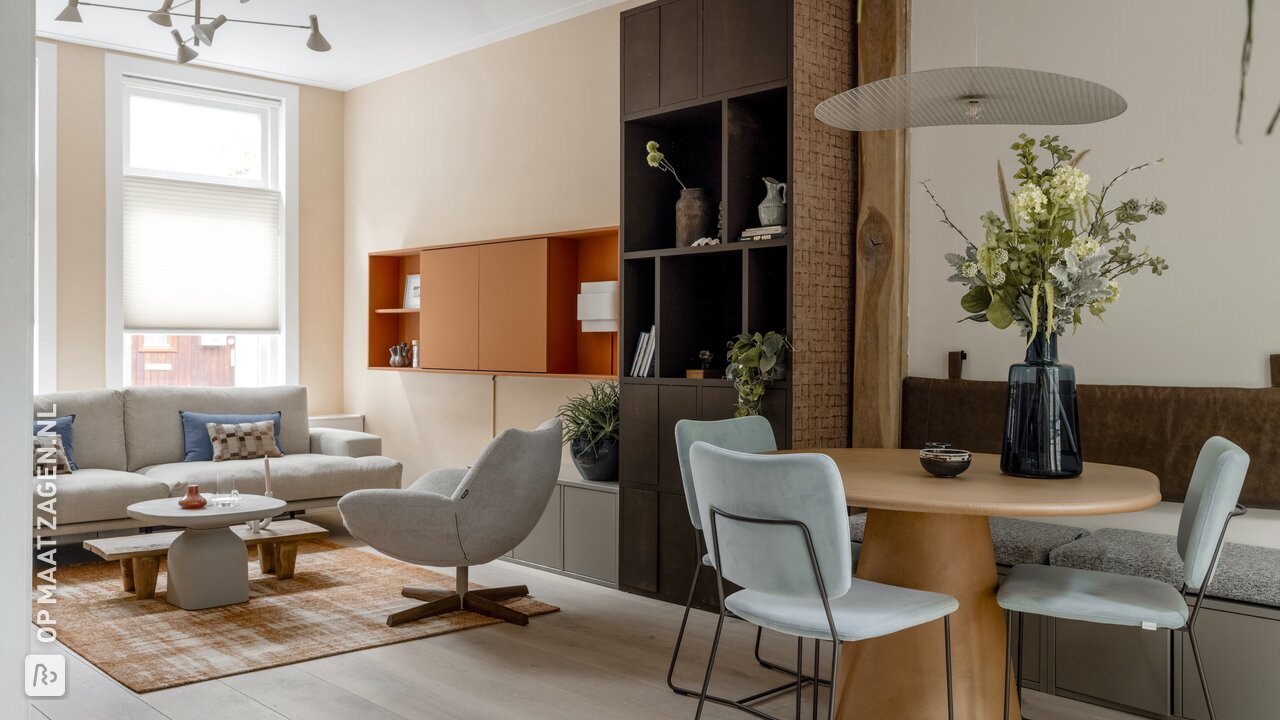
- The back panel is mounted per compartment in the cabinet and aligns with the back of the vertical and horizontal supports. This results in a nice closed and smooth back, but you can still see the layout pattern of the compartments. Clear photos of what the back panel looks like can be found in the DIY project by Marion.
- If you want to omit the back panel in some compartments, read this article.
- It is also useful to consider the stability and mounting on the wall to prevent the cabinet from tipping over.
- You can order an additional plate of 6 or 9 mm the size of the cabinet, or in multiple parts, through our sawing service and place it against the back. This way, you can create the effect of a partition wall.
Frequently Asked Questions
Can I have the back panel adjusted?
It cannot be adjusted in thickness or material. The back panel is essential for the stability of your cabinet and is a fixed part of the design. However, you can order an additional plate of 6 or 9 mm the size of the cabinet, or in multiple parts, through our sawing service and place it against the back to create the effect of a partition wall.
Can I omit the back panel?
The back panel is necessary for the sturdiness of the cabinet. Omitting it is not recommended and is only possible at your own risk. Keep in mind that the holes will still be visible. More information about omitting the back panel in a compartment.
How do I move the back panel forward in a compartment?
Indicate when placing your order that you want the back panel of an open compartment to be placed further forward. We will then provide the correct measurements and installation instructions.
Creative ideas for decorating the back panel
Would you like to give your back panel a unique look? There are several ways to personalize the back panel of your cabinet, such as:
- Slats: Place wooden slats vertically or horizontally for a modern look.
- Wallpaper: Wallpaper the back panel with a pattern or color that fits the rest of your interior.
- Paint: Give the back panel a fresh color to make a statement in your room.
The back panel of your cabinet is more than just a functional component; it is an important element for stability and design. If you have any questions, feel free to contact us, and we will be happy to assist you!